Best Telescopes for Astrophotography
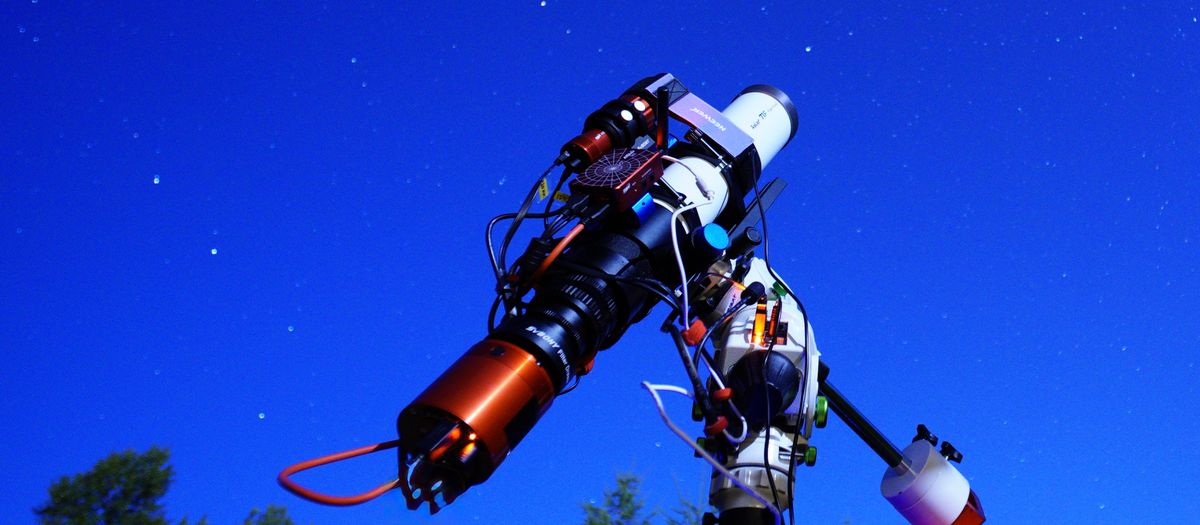
Astrophotography flips the priorities: a steady tracking mount matters more than raw aperture, and the focal ratio drives how long your exposures need to be. This guide compares beginner imaging gear on the specs that decide the result — aperture, focal length, focal ratio, mount and optical design — across five categories: best overall, best budget, best starter imaging refractor, best tracking mount for imaging and best smart / all-in-one astro scope. The verified picks appear in each slot once real product data is in.
A note on how to read this. There is no single "best" imaging setup for everyone — the right one depends on whether you want the Moon and planets or faint deep-sky objects, how much you will process afterwards, and your budget. So the value here is the framework: what each spec changes, so you can match a setup to your goal. The honest truth I share at our star parties is that the big visual scope people already own is usually the wrong first imaging scope — long, slow and heavy, exactly what imaging punishes. Start with tracking and a modest fast scope, and the Moon on your very first night.
Specs verified against manufacturer details and current Amazon listings — no hands-on testing claims, just the figures and the trade-offs that decide the fit. Focal-ratio and exposure relationships are physics-derived from published specs.
How to choose an imaging telescope
A few specs decide whether a scope suits imaging. These are exactly the columns in the comparison below.
Mount first — tracking is the foundation
In astrophotography the mount matters more than the telescope, because the camera records every tracking error as a smeared or trailed star over an exposure that may last seconds or minutes. A mount that tracks the sky accurately and holds steady is what keeps the target locked on the sensor, so its tracking precision sets the ceiling on your results — a modest scope on a good mount beats a great scope on a shaky one. This is why the standard advice is "spend your money on the mount." See the best telescope tripod guide for the equatorial tracking bases that make imaging possible.
Focal ratio — it sets your exposure times
Focal ratio (the f-number — focal length divided by aperture) controls how fast the sensor collects light. A fast scope at f/5 gathers light far quicker than a slow one at f/10, so it reaches the same brightness in much shorter exposures — which means less demand on your tracking and fewer ruined frames. For deep-sky beginners, a fast focal ratio of about f/4 to f/6 is the friendly zone. The exception is the Moon and planets, which are small and bright: there a slower, longer scope gives a bigger image scale and is actually the better tool.
Aperture, focal length and optical design
Aperture and focal length set the image scale and reach, but more is not automatically better for imaging: a long focal length magnifies tracking errors too, so beginners often start short and forgiving. Optical design shapes the whole experience — a small apochromatic refractor is the classic beginner deep-sky imager (light, fast, no collimation, clean stars), while a reflector gives more aperture per dollar but needs collimation and careful balance, and a compound scope packs long focal length into a short tube for lunar and planetary work. The astrophotography hub covers what each is good for.
The telescopes compared
A short list of widely available beginner imaging telescopes and mounts, compared on the specs above. Specs are verified against manufacturer details and current Amazon listings — no hands-on testing claims, just the figures and the trade-offs that decide the fit.
| Best for | Aperture | Focal length | Focal ratio | Mount type | Optical design |
|---|---|---|---|---|---|
| Best overall | 122 mm | 854 mm | f/7 | OTA only (no mount) | Triplet APO refractor (FPL53) |
| Best budget | 80 mm | 560 mm | f/7 | OTA only (no mount) | ED achromatic refractor |
| Best starter imaging refractor | 70 mm | ~475 mm | f/6.78 | OTA with built-in field flattener | ED refractor |
| Best tracking mount for imaging | N/A (mount only) | N/A | N/A | Equatorial tracker | N/A |
| Best smart / all-in-one astro scope | Not listed | Not listed | Not listed | AZ/EQ motorized (app-controlled) | Smart imaging scope |
Our top picks
Best overall: SVBONY SV550 122mm F7 APO Triplet Refractor Telescope for Astrophotography, FPL53 Extra-Low Dispersion Glass Optical Tube Assembly

Best overall
SVBONY SV550 122mm F7 APO Triplet Refractor Telescope for Astrophotography, FPL53 Extra-Low Dispersion Glass Optical Tube Assembly
SVBONY
- Aperture: 122 mm
- Focal length: 854 mm
- Focal ratio: f/7
- Mount type: OTA only (no mount)
- Optical design: Triplet APO refractor (FPL53)
- Weight: 6.44 kg
The SVBONY SV550 uses FPL53 extra-low-dispersion triplet optics to deliver a flat, colour-free 854mm f/7 image circle large enough for full-frame sensors — the best all-round astrophotography refractor at this price.
Price as of Oct 9, 2026, 07:45 UTC — details
Prices and availability are accurate as of the date/time indicated and are subject to change. Any price and availability information displayed on Amazon at the time of purchase will apply.
Last checked 2026-06-14
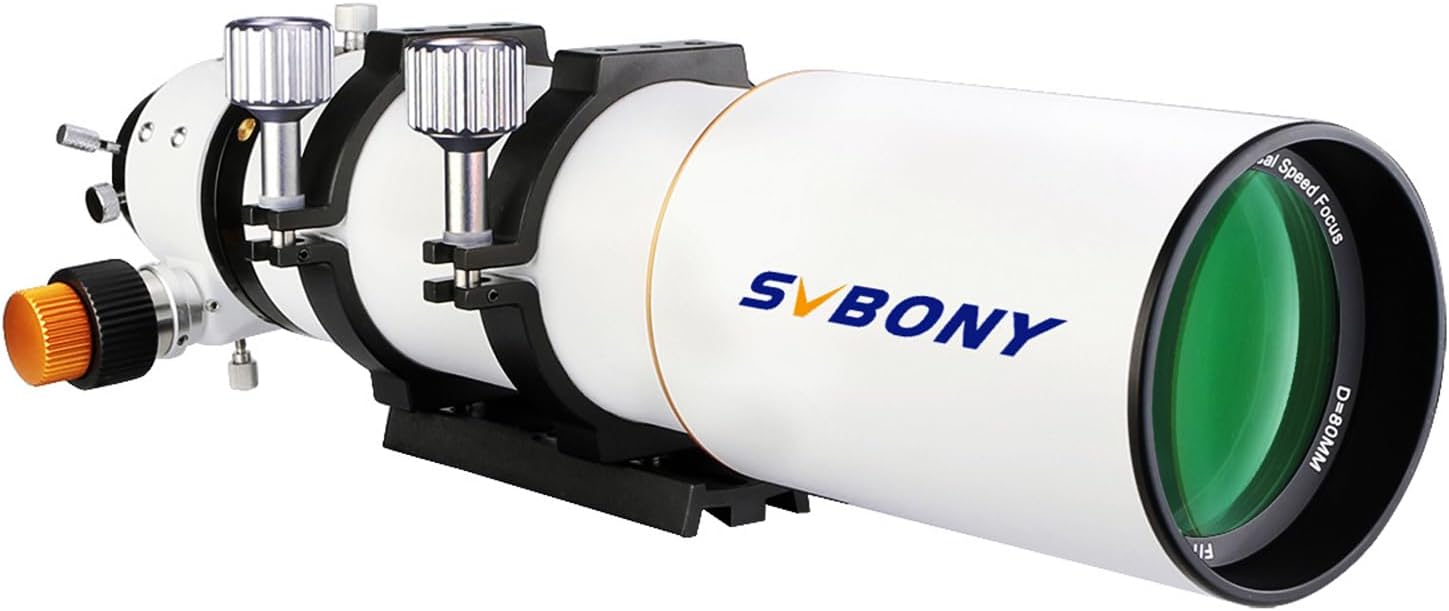
Best budget: SVBONY SV503 80mm F7 ED Refractor Telescope OTA for Astronomy and Astrophotography
Best budget
SVBONY SV503 80mm F7 ED Refractor Telescope OTA for Astronomy and Astrophotography
SVBONY
- Aperture: 80 mm
- Focal length: 560 mm
- Focal ratio: f/7
- Mount type: OTA only (no mount)
- Optical design: ED achromatic refractor
- Weight: Not listed
The SVBONY SV503 80mm offers a single ED element to reduce chromatic aberration at a budget price, making it the most accessible imaging refractor for beginners stepping into astrophotography.
Price as of Oct 9, 2026, 07:45 UTC — details
Prices and availability are accurate as of the date/time indicated and are subject to change. Any price and availability information displayed on Amazon at the time of purchase will apply.
Last checked 2026-06-14
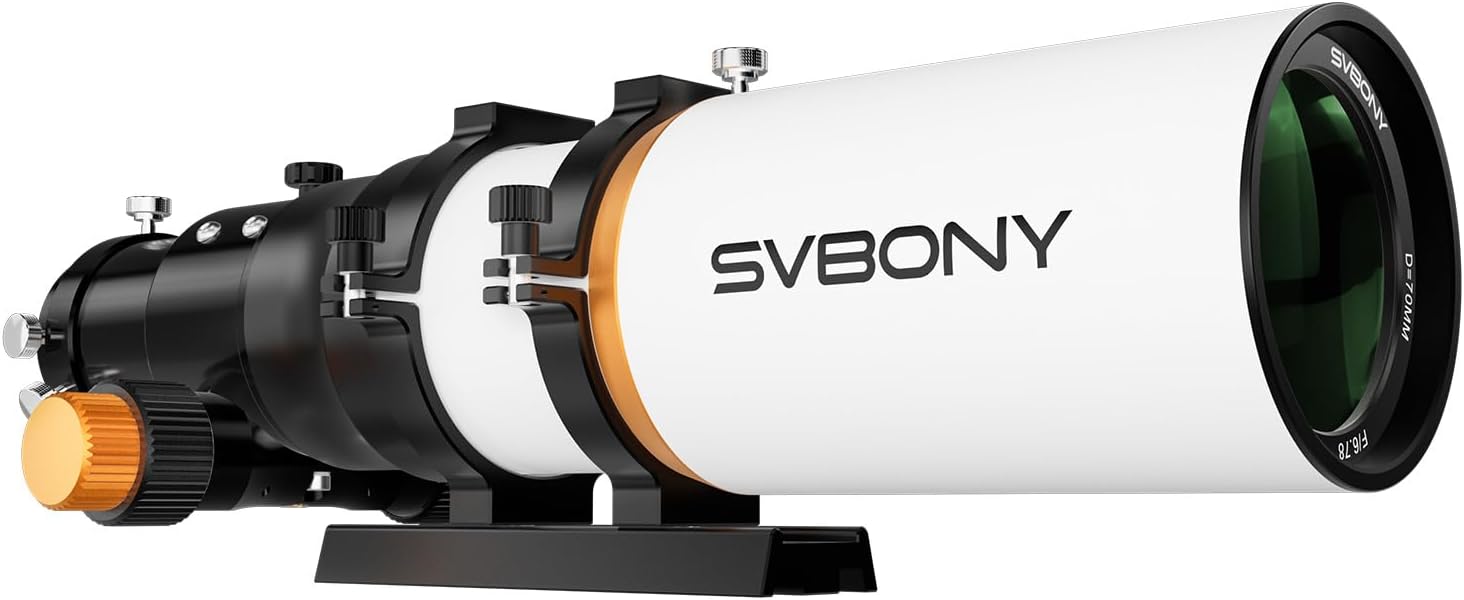
Best starter imaging refractor: SVBONY SV503 70mm F6.78 ED Refractor Telescope with Field Flattener for Astrophotography
Best starter imaging refractor
SVBONY SV503 70mm F6.78 ED Refractor Telescope with Field Flattener for Astrophotography
SVBONY
- Aperture: 70 mm
- Focal length: ~475 mm
- Focal ratio: f/6.78
- Mount type: OTA with built-in field flattener
- Optical design: ED refractor
- Weight: Not listed
The SVBONY SV503 70mm bundles an ED refractor and a built-in field flattener in one unit, giving flat stars across APS-C sensors right out of the box — the simplest starter package for imaging without buying extra accessories.
Price as of Oct 9, 2026, 07:45 UTC — details
Prices and availability are accurate as of the date/time indicated and are subject to change. Any price and availability information displayed on Amazon at the time of purchase will apply.
Last checked 2026-06-14
Best tracking mount for imaging: Sky-Watcher Star Adventurer 2i Pro Pack – All-in-One Motorized Equatorial Mount for Astrophotography

Best tracking mount for imaging
Sky-Watcher Star Adventurer 2i Pro Pack – All-in-One Motorized Equatorial Mount for Astrophotography
Sky-Watcher
- Aperture: N/A (mount only)
- Focal length: N/A
- Focal ratio: N/A
- Mount type: Equatorial tracker
- Optical design: N/A
- Weight: Not listed
The Sky-Watcher Star Adventurer 2i Pro Pack is a compact equatorial star tracker with WiFi and polar-alignment assistance, allowing long-exposure imaging from a lightweight travel setup without a full observatory mount.
Price as of Oct 9, 2026, 07:45 UTC — details
Prices and availability are accurate as of the date/time indicated and are subject to change. Any price and availability information displayed on Amazon at the time of purchase will apply.
Last checked 2026-06-14
Best smart / all-in-one astro scope: Dwarf 3 Smart Telescope – All-in-One Auto-Tracking Astrophotography Telescope with WiFi and App Control

Best smart / all-in-one astro scope
Dwarf 3 Smart Telescope – All-in-One Auto-Tracking Astrophotography Telescope with WiFi and App Control
DWARF LAB
- Aperture: Not listed
- Focal length: Not listed
- Focal ratio: Not listed
- Mount type: AZ/EQ motorized (app-controlled)
- Optical design: Smart imaging scope
- Weight: 1.35 kg
The Dwarf 3 is a self-contained smart telescope with built-in camera, motorised tracking, and app control — point, tap, and it captures and stacks images automatically, making astrophotography accessible without any manual setup.
Price as of Oct 9, 2026, 07:45 UTC — details
Prices and availability are accurate as of the date/time indicated and are subject to change. Any price and availability information displayed on Amazon at the time of purchase will apply.
Last checked 2026-06-14
Who should buy what
The serious starter — a fast scope on a tracking mount
The best overall pick for beginner imaging pairs a fast, forgiving scope with a solid equatorial tracking mount. Spec-by-spec, a fast focal ratio shortens exposures and a precise mount keeps stars round, which together are what separate keeper frames from trailed ones. This is the setup that grows with you from the Moon to deep-sky.
The trade-off is cost and a learning curve: polar alignment, focus and processing all take practice. But it is the configuration that does not become a dead end after a month — and the money goes where it matters, into tracking, rather than into raw aperture the camera cannot use on a shaky base.
The cautious budget — image what you already can
The best budget route leans on lunar and planetary imaging, which is forgiving of modest gear: short video clips through a scope you may already own, stacked into one sharp frame. A phone adapter or an inexpensive planetary camera is enough to get a genuinely satisfying Moon shot on the first clear night.
What you give up is deep-sky reach — without a tracking mount, nebulae and galaxies stay out of practical range. That is the right trade for testing whether imaging grabs you before committing to an equatorial mount. Start here, and add tracking only once you know you want the faint stuff.
The deep-sky beginner — a small imaging refractor
The best starter imaging refractor slot is the classic deep-sky entry: a small apochromatic refractor, light and short, with a fast focal ratio and clean, colour-true stars. Its low weight is a feature, not a compromise — a light scope is easy for a beginner tracking mount to carry accurately, which is exactly what deep-sky imaging needs.
The cost is aperture and reach: a small refractor will not pull in the faintest targets the way a big visual scope does, and apochromatic glass is expensive per inch. But for wide-field nebulae and the brighter galaxies, a small apo on a good mount is the setup most beginners succeed with first.
The mount-first buyer — invest in tracking
The best tracking mount for imaging slot reflects the single most important truth in astrophotography: spend on the mount. A precise equatorial tracking mount with payload headroom over your imaging scope is what holds the target locked on the sensor through a long exposure, and it outlasts any one telescope you bolt onto it.
The trade-off is weight and setup time — polar alignment and a counterweight come with the territory. If you buy nothing else well, buy the mount well; the best telescope tripod guide covers the equatorial bases that imaging depends on.
The convenience-minded — a smart all-in-one scope
The best smart / all-in-one astro scope slot suits beginners who want results with the least fuss: a self-contained smart telescope that aligns, tracks, captures and stacks largely automatically through an app, no separate mount or camera to assemble.
The trade-offs are a sealed system you cannot upgrade piece by piece, a small fixed aperture, and less of the hands-on craft that traditional imaging teaches. But for someone who wants to see a nebula appear on their phone tonight rather than learn polar alignment first, a smart scope is a genuinely valid on-ramp — just go in knowing it is a convenience tool, not an upgrade path.
Where to start
If you are not yet sure imaging is for you, the smartest first move is a good visual scope you can also image the Moon through — the best telescope for beginners guide covers the scopes that double as forgiving lunar imagers. When you are ready to track the sky for longer exposures, the best telescope tripod guide covers the equatorial mounts that make it possible. And the What Can I See calculator tells you what any aperture will actually resolve before you spend.
A word on solar imaging
If you ever turn a scope toward the Sun, treat it as safety-critical: never point a telescope at the Sun without a properly certified front solar filter — only ISO 12312-2 certified filters, fitted over the front, following the manufacturer's instructions, never a screw-in eyepiece filter. Improvised filters can cause permanent eye damage. When in doubt, observe or image the Sun only at a club event with proper equipment.
Frequently asked questions
What is the best telescope for beginner astrophotography?
For imaging, a stable tracking mount matters more than raw aperture, and a fast focal ratio (a smaller f-number, say f/4 to f/6) shortens exposures and forgives small tracking errors. Spec-by-spec, many beginners start with a small apochromatic refractor on a tracking mount — light, short focal length, easy to guide — or simply do lunar and planetary imaging on a scope they already own. The big telescope you bought for visual observing is often the wrong first imaging scope, because long, slow tubes are unforgiving. Verified picks land here once real data is in.
Should I start with the Moon or deep-sky objects?
Start with the Moon and planets. They are bright, need only short exposures, and are forgiving of modest gear, so you get a satisfying result on your first night. Deep-sky imaging (nebulae and galaxies) needs minutes-long exposures, precise tracking, careful focus and a lot of processing, so it is far better as a second step once the basics click.
Why does the mount matter more than the telescope for imaging?
Because the camera records every tiny tracking error as a smeared or trailed star, over an exposure that may last seconds or minutes. The mount is what holds the target locked on the sensor that whole time, so its tracking accuracy and stability set the ceiling on your results — a modest scope on a good mount beats a great scope on a shaky one. The usual advice, "spend your money on the mount," is true: it is the single most important purchase in an imaging setup.
What does focal ratio do in astrophotography?
Focal ratio (the f-number — focal length divided by aperture) controls how quickly the sensor collects light. A fast scope at f/5 gathers light far quicker than a slow one at f/10, so it needs much shorter exposures to reach the same brightness — which means less demand on your tracking and fewer ruined frames. That is why beginners are steered toward fast scopes for deep-sky work, while slow scopes are actually better for the small, bright Moon and planets.
Can I use my visual Dobsonian for astrophotography?
For the Moon and planets, yes — short video clips through a Dobsonian, stacked into a single sharp image, give excellent lunar and planetary results even without tracking. For deep-sky objects, a Dobsonian is poorly suited: its simple base does not track the sky, so long exposures trail, and the alt-azimuth motion introduces field rotation. If deep-sky imaging is the goal, you need an equatorial tracking mount, not just a bigger scope.
Do I need an expensive astronomy camera to start?
No. Many beginners start with a phone adapter on the Moon, a DSLR or mirrorless camera they already own, or an inexpensive planetary camera that captures video for stacking. A dedicated cooled astronomy camera is a later upgrade for serious deep-sky work, not a first purchase. Spend early money on the mount and learning the workflow; the camera can be modest at the start.
How dark does my sky need to be for astrophotography?
Less dark than you might think for the Moon and planets — they are bright enough to image from a city, because light pollution barely affects them. Deep-sky imaging is far more sky-dependent: nebulae and galaxies are faint, so bright skies drown them, though narrowband and light-pollution filters can claw back some targets from suburban skies. A good plan is to learn the craft on the Moon at home, then travel darker for deep-sky.
Is solar imaging safe?
Only with the right equipment, and it must be treated as safety-critical. Never point a telescope at the Sun without a properly certified front solar filter fitted over the front of the tube — not a screw-in eyepiece filter, which can crack under concentrated heat. Use only ISO 12312-2 certified solar filters, follow the manufacturer's instructions, and when in doubt observe or image the Sun only at a club event with proper equipment. Improvised filters can cause permanent eye damage.